Announcement

Collapse
No announcement yet.

Complete Bedini SG Book!

Collapse
This is a sticky topic.
X
X
 
  • Filter
  • Time
  • Show
Clear All
new posts

  • Hi Gary,

    Thanks for all your answers!

    #1 Ah vs Wh / COP
    My SSG running in generator (common ground) mode will consistently get an electrical COP over 1 in amp hours. However, if you take voltage into account and compare the watt hours, it comes out a little under a COP of 1.
    I’ve read through the results on your website of your SSG and also started reading a bit about the difference between Ah and Wh, to have a better understanding of the two and thus being able to understand which one is important in which situation/comparison.
    I understand the Ah COP calculation of 1.25 you make (not including mechanical work). However, you say that if you compare Wh, you end up under a COP of 1.
    I would say that it is the COP over 1 for the Wh (or actually work done / Joules) that we’re after and the Ah COP is not so interesting. But apart from that, I tried to calculate an energy (in Joules) COP based on the info on your website and I end up with a COP higher than 1, not lower, see attachment. Did I make a mistake in my calculation?


    #2 Swapping primary / secondary battery
    When I repeatedly swap the batteries back and forth, it takes a little longer each cycle to recharge the charge battery.
    I’m a bit confused now with your statement quoted above compared to what you said about this in post #218. Maybe the confusing arose based on my initial (or John’s) choosing of wording:
    When in post #217 I referred to John saying “you run them both down” (when swapping primary and secondary), I did not mean that both batteries would be damaged, but that you empty them both out eventually. Now this seems in line with what you state in the above mentioned quote.

    #3a 1-Ohm resistor experiment
    I thought I ordered a 1-Ohm 0.6W resistor and a 0.5-Ohm 6.5W resistor, but it seems that I accidentally only ordered the latter one. So I put the 0.5-Ohm 6.5W resistor between the output wires and started my SG:
    -Neon bulbs where off (as they should)
    -After +/-1.5min the resistor became luke warm. After +/-3min it was warm. After +/-5min it was hot, could not touch it for very long anymore.


    Since this was 6.5W 0.5-Ohm resistor, I expect that the 1-Ohm 0.6W resistor would have gotten hot way quicker.
    I just finished DVD 25. In that DVD John tells about the flickering / intensity of the neon bulb being an indication of how well the circuit is tuned. In order to have more validation /analyzing data for the results as mentioned with my 0.5-Ohm resistor, I disconnected the resistor and filmed the “disco” of Neon bulbs for a bit. The video can be seen here: https://www.dropbox.com/s/l32kpkuokp...0test.mp4?dl=0

    I do realize that it is not recommended to run the SG disconnected, don’t intend to do it if not necessary
    As mentioned in earlier posts, I have matched resistors & transistors in my circuit and tuned my SG with a variable resistor, which is still in there.


    #3b Amperage in radiant mode
    There is a small amount of current along with the radiant spike and also there is an electric field around the conductor that the sniffer coil can detect.
    I think I got a bit confused by the DVDs when John is mentioning that the output is current less / a 1-Ohm resistor should not heat up.
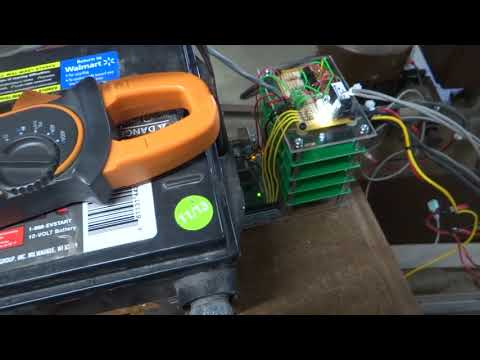
    Although voltage peaks are very narrow/short, when the frequency is high enough the momentary current that is accompanied by it will heat up the resistor eventually. I remember reading statements somewhere that putting an amperage meter on the output side would not correctly indicate the amperage. My question is: why not? If a amperage meter can be hooked up on the input side, giving an amperage reading of the pulses drawn from the primary battery, why can I not do the same on the output side?


    Thanks for your time.

    Best regards,
    Rodolphe


    P.S. still building the capacitor dump circuit, if I have it up and running I’ll post on the other forum thread where we’re talking about that circuit.
    20-02-16.pdf

    Comment


    • Hi Rodolphe,

      #1
      Forget about the voltages at rest. The power taken from the battery during discharge has to be calculated using the average voltage under load. Looking at the discharge curve you will see that it starts out at about 12.35 volts and ends at about 12.09 volts at a constant 1 amp rate for exactly one hour. (12.35 + 12.09) / 2 = 12.22 ave voltage. 12.22 volts x 1 AH = 12.22 watt hours pulled from the battery. or 12.22 watt hours x 3600 joules / watt hour = 43.99 KJ of energy supplied during discharge.

      Then using the ave 1.6 amp draw on the run battery to power the SSG during recharging, the average voltage supplied under load by the run battery is 12.53 volts just as you calculated. The 1.6 amp draw was measured maybe 3 times during the discharge with my old analog FET-VOM so is only an approximation! I rounded the 29 minutes to 30 minutes or 1/2 hour at 1.6 amps to get the .8 AH draw. So 12.53 volts x .8 AH = 10.024 watt hours to recharge. (10.024 x 3600 = 36.086 KJ)

      So 12.22 WH / 10.024 WH = 1.22 COP in watt hours. Keep in mind that I started with fully charged batteries and had two batteries in parallel for the run battery which reduced the voltage drop while running the SSG. The higher the supply voltage, the faster the SSG runs and the faster it will recharge another battery. And the method and meter I used to measure the current draw from the run battery is probably not accurate and serves as only an approximation. And as you noted, the calculations leave out the mechanical power delivered to the two fans. Therefore I think that i can safely say the machine was delivering well over a COP of 1 all things considered.

      #2
      Every time I've run the machine continuously (using equally matched batteries) and swap batteries when the charge battery reaches 15.3 volts, I've found that the time to recharge takes a little longer each cycle. This tells me that the electrical COP is still a little less than 1. Doing this also doesn't allow the batteries to rest or normalize and absorb the charge. And of course all the mechanical power produced is unmeasured as well. One other consideration is that the batteries should be well matched to the machine and operated at their C20 rate of discharge. For my machine that requires a 32 AH battery for running in generator mode and a a 24 AH battery when running in radiant mode. And in radiant mode my machine takes approximately twice as long to charge this size battery as it does in generator mode.

      #3a
      Don't worry about the 1 ohm resister test. I think the only reason John mentions this is to make sure you're not driving the primary circuit with too much current. When built to John's specs, the SSG in radiant mode should only draw about 175 ma per coil winding when properly tuned. With a seven power wire coil that would be not over 1.22 amp draw on the primary. In generator mode 250 ma per winding is considered normal for about 1.75 amps for your coil.

      #3b
      The sampling rate of a digital VOM causes the readings to jump all over the place when trying to read a rapidly pulsing dc current. An analog meter will supposedly average out the pulses and give a more accurate reading, but even this is an approximation at best when used on the input. And on the output side the voltage spikes are so high and so short lived that the analog meter can't read them either. In fact, the meter will absorb and kill a large percentage of the radiant energy which greatly reduces the charge rate anyway. The results of trying to measure the output this way is meaningless and inaccurate. If you look at the charge curve I posted on my website you can see a large spike and then voltage drop about 1/3 of the way up the curve. That's where I momentarily inserted an analog ammeter to measure the current draw from the run battery. If it causes that big of a disruption to the run circuit, think how much greater the effect would be if done on the output side!

      Comment


      • Dear Garry,

        Thanks for all your answers.

        #1 COP & #2 swapping batteries
        Therefore I think that I can safely say the machine was delivering well over a COP of 1 all things considered.

        I follow your calculations and comments you have on my calculation and thought that we then are in agreement that the electrical COP is over 1, since we’re doing an electrical calculation in Joules (or Wh).

        Now I’m a bit confused when you state:

        Every time I've run the machine continuously (using equally matched batteries) and swap batteries when the charge battery reaches 15.3 volts, I've found that the time to recharge takes a little longer each cycle. This tells me that the electrical COP is still a little less than 1.
        If this phenomena takes place as you describe, that when swapping the batteries it takes longer each to charge after each cycle, that does not necessarily mean the COP is below 1 (we calculated it is above 1), but could be due to causes as you mentioned: Not giving the batteries enough time to rest, having just 1 battery at the input instead of 2 or 3 in parallel (not sure if in this swapping test you had some in parallel or not), or maybe we have to reconsider what we talked about before that John mentioned that you cannot just swap the primary and the secondary (unless you have a separate output winding at the output, like Johns original models).
        Talking about John’s original models, with a separate output winding;
        If I understood correctly, he did the swapping of the primary and secondary and could when doing so run his machine indefinitely. So do I assume correctly then, that he did not let the batteries rest before swapping them?
        Further more I read in the manuals that the SG in attraction mode, as described in the manuals, is more energy efficient than John’s original model with the separate output coil. So if he was able to get above a COP of 1 and swapping the batteries, the SG as described in the manuals (that you have) should be well above that correct?


        #3 Amperage in radiant mode
        To verify the amperage ranges that you mention/to see where my machine is at, I bought another 12Ah battery for the input (battery A), which is the same type/brand battery as I have at the output (Battery B). (For more accurate measurement in the future I might put two or three in parallel at the input as you mentioned).
        Before starting measurements:
        -I tried to charge battery A with my SG to 15.3V, but could get there so easy and disconnected it after a while (maybe because the battery has never been used before?). After charging battery A was sitting at a resting voltage of 12.95V.
        -I discharged battery B a bit (for about 45min over a 20-Ohm resistor).
        -Retuned the SG with the variable resistor/potmeter to the highest rpm (+/-191RPM @ +/- 82-Ohm, +/-6.4mm gap)
        Measurements:
        -I hooked up an analog amperage meter with a switch so I could bypass the meter if I wanted. So I only took a couple of incidental measurements as you mentioned.
        -While running I have the following measurements at the input side +/- 1A, 12.52V, 191rpm. This is with 8 power coils. So roughly 0.125A/coil.
        So based on the amperage draw you mentioned for a 7 coiler, my 8 coiler seems to do ok, correct?
        (see attachment for photos)


        #4a 1-Ohm Resistor experiment
        However, I did not want to do so quickly away with John’s remark about the 1-Ohm resistor. So I did the test again, this time with a 1-Ohm resistor (2Watt), after the re-tuning mentioned above (and a battery at the input rather than a power supply): within 10 seconds it got so hot I could not hold it anymore.

        Furthermore I hooked up the scope again to one of the coils to see if it was still firing multiple times. I did a measurement before the re-tune, with the power supply as input and after re-tuning, with a battery as input: Before it triple fired, after it double fired.
        This multi firing together with the 1-Ohm resistor test keeps me wandering if my machine is performing as it should. Dave Wing commented on this as well in post #212, that I should tune for 1 pulse instead of multiple. I’ll ask him too to comment on the measurements/phenomenon mentioned above.
        (see attachment for screenshots)


        #4b 100-Ohm Resistor experiment
        Another question that came to mind regarding the experiment where this all started with, the 100-Ohm resistor:
        When doing this experiment, the Neons lit up, telling me the (radiant) energy is discharged over the Neons and not through the output. So how can it be than, that the resistor still heated up?


        #5 Sniffer coil
        My sniffer coil is just a few (200 or 300?) turns of AWG 26 wire wrapped around a short piece of 3/4" pvc plastic pipe.
        I bought a spool AWG26, and calculated it has around +/-650 windings. Could I use it as is? Or should the amount of windings be more in the ballpark that you mention, 200 to 300 because it would have a too high impedance? In case I do need to reduce the amount of windings, is there an easy way/trick to count them when winding? How did you manage to count the amount of your windings? I could lay out a couple of meters on the floor, and then with the bobbin diameter I can roughly calculate it, but I guess that is not how you did it?

        Many thanks in advance,
        Best regards,
        Rodolphe

        2020-03-01.pdf
        Attached Files
        Last edited by pearldragon; 04-08-2020, 03:08 AM.

        Comment


        • Dear Dave,

          In post #212 you write:
          You want to tune the machine to one pulse this will maximize the rotor speed and increase AC generator output.
          As you can read in post #228, I’ve done re-tuning of my SG, optimizing for max rpm. In the attachment of that post you can see that my SG still double fires. Could you comment on this please: Staying within the limits of the manuals (meaning not swapping cores/coils (yet)), what causes the double firing?
          What can I do about it taking into account that I tuned for max speed? I mean, should I try to adjust the variable resistor/potmeter to see if there is a value where it starts single firing with the consequence that my SG runs at a lower rpm?
          Or could (the spacing of )the magnets have anything to do with it? The dimensions of the wheel and spacing are more or less according to the handbook, so I guess that only the magnets themselves could be too far off from the specs in case the cause is indeed the magnets.
          The magnets I have are these:
          https://www.wecomagneten.nl/p/ferrie...-fe-b-60x20x15
          See attachment for specsheet, I have the Y35.


          Furthermore, why is double firing unwanted? Is it not just two for the price of one?

          I do have some more questions about your original comments, but I thought I start off with what is most important in making sure my SG runs as good as possible staying within the limits of the manual.

          Many thanks in advance,
          best regards
          Rodolphe


          Click image for larger version

Name:	2020-03-01 -Magnets - Spec sheet.jpg
Views:	424
Size:	70.7 KB
ID:	72622

          Comment


          • What I would do is turn the potentiometers resistance down until the SG reaches close to top speed. What I would also do is like you said earlier, familiarize yourself with your Basic SG before you move on, then build another coil how I described earlier.

            What is not mentioned in the SG manuals is that the trigger wire uses negative generated current and coil collapse (these two add together in the right current flow direction, counter clockwise, which is opposite of the clockwise applied current from the power supply or battery) to heat up the base resistor. So this is an energy draw on the process, that hurts your gains you see in the secondary battery. If you trigger the master power windings with a separate trigger coil (make one on a tiny spool with an iron core) the rotor will run much faster. Any rotating DC Motor or DC pulse motor windings generate AC current.like I said before the SG is a motor generator.

            I believe you can generate more electrical output than it costs you to turn the rotor. JB demonstrated this on the cardboard box, when Dave Clements came for a visit on Energy From The Vacuum. Again JB shows it here in the waveform on the lab note from my post number 308 http://www.energyscienceforum.com/fo...ic-model/page8

            Peter Lindemann also showed how to widen the coils on the standard spool for more magnetic energy gains and he also said in his most recent video some things that were contrary to what many may believe here on this forum about the SG and what it is or could be.

            Anyway I know when just starting out it is hard to make heads or tails of things, don’t give up or get discouraged.

            Dave Wing
            Last edited by Dave Wing; 03-01-2020, 07:49 PM.

            Comment


            • Hi Dave,

              Thanks for your answers.

              What is not mentioned in the SG manuals is that the trigger wire uses negative generated current and coil collapse (these two add together in the right current flow direction, counter clockwise, which is opposite of the clockwise applied current from the power supply or battery) to heat up the base resistor.
              First I just want to double check that we understood/understand each other correctly; When I speak in the posts above about the resistor heating up, I’m not talking about the base resistors.
              I’m talking about replacing the secondary battery (output of the SG) for a resistor (I tested with a 0.5 Ohm, 1 Ohm, and 100 Ohm resistor), to see if and how quickly they heat up. These tests I did as a verification because in one of the DVDs John mentions that if you place a 1 Ohm resistor at the output of the SG (instead of a battery) and it heats up, your SG does not run correctly.


              Breakthrough!
              So what I had done so far when tuning the SG is starting the SG until it ran at max speed, which so far yielded +/-191rpm max, with double firing… Reading your reply today I thought, well maybe I should scan the whole spectrum of the potmeter again, and see if it fires single at some point even though it might be at a lower rpm. So I started it up and waited till it got to max rpm (potmeter at +/- 82 Ohm, +/- 191rpm), then I turned resistance of the potmeter down and while I did so the rpm dropped as well, until at one point it increased super fast again to 277rpm and single fired instead of double! I stopped the machine to measure where the potmeter was at: +/- 40.5 Ohm.
              But now comes the funny part; when I started my SG again it did not sped up to this 277rpm again, but stuck at +/- 170rpm… I then reduced the resistance of the potmeter again a bit and it increased again till about 254rpm. Then I had to increase the resistance again to tune it back to max rpm: 277... I then stopped the machine again and started it up again, but had to repeat the same process to get it to 277 rpm which is:
              1 start the machine and wait till rpm gets stuck @ +/- 170
              2 decrease the resistance of the potmeter a bit till the SG speeds up rapidly
              3 increase the resistance of the potmeter for max rpm +/- 277.
              Is this the ritual you guys have to do as well???


              At this 277 rpm current draw is +/- 1.8A, voltage +/- 12.35V (resistance +/- 44.5 Ohm).
              So Gary, I’m above that reference value you gave me of 0.175mA/coil in radiant mode when I tune my machine for max rpm. With my 8-coiler, I sit now at 1.8/8 = 0.225mA.


              Again 1 Ohm resistor test:
              So with these completely new parameters I was curious to find out what the outcome this time would be of the “1 ohm resistor test at the output”. So when at top speed, I shortly switched of the SG and swapped the output battery for my 1 Ohm 2W resistor, switched the SG back on and held the resistor between my fingers: within 2 seconds it got so hot that I could not hold it anymore and switched of the machine (with my previous settings, running at max 191 rpm, this took about 10 seconds). So here I’m still with a question mark when John says: Your machine does not run well if a 1 Ohm resistor at the output gets hot.


              I had a quick look on the forum thread that you sent a link from, but most of it still goes a bit over my head. I did go to the YouTube link that was in post #308 and saved the movie, so I’ll watch it at some point later in time.

              Peter Lindemann also showed how to widen the coils on the standard spool for more magnetic energy gains and he also said in his most recent video
              Do you have a link to this video as well by any chance?


              Anyway I know when just starting out it is hard to make heads or tails of things, don’t give up or get discouraged.
              Well, you hit the nail on the head: coming from a mechanical background I have SO much questions about this machine, and so much on my to do list to read/watch/test etc., but my focus is as follows: Build the SG working correctly through the manuals and try to the watch the “Energy from the vacuum DVDs” in between. Then I have some books from Bearden/John and Peter L. which I want to get to too, but not yet sure how those need to fit in timewise … But I will not give up, that’s for sure! If anything, I will dedicate more and more time to it.


              Thanks,

              Best regards
              Rodolphe

              2020-03-04 attachment.pdf

              Comment


              • In Gary’s post number 220, you can see Peter’s machine with the wider coil cores.

                When looking at the resistor across the secondary to me it serves not much of a purpose, as my personal goal is to produce the maximum amount of energy into the secondary for the least amount of input current used. The goal here is to produce a strong electro magnet for less current, you have to use longer small diameter wire for this.

                Again to me the goal is to maximize output going to your secondary battery, while cutting input energy costs on your primary, long thin multi strand wires will do this, it will increase the magnetic field strength and recovery to your secondary but you must also raise your input supply voltage too. For example if you get 95 percent back to the secondary you can start thinking of ways to cascade a second pulse driven coil circuit off the secondary energy recovery of the first circuit and so and so forth.

                Paul Babcock presented this power point image in his first video when talking about Joe Newman’s discovery of pure genius... the energy it takes to make a magnetic field as in Joes book.

                Click image for larger version  Name:	899ACD42-6F68-4CD1-B7CB-E02ED068B07E.jpeg Views:	0 Size:	545.9 KB ID:	72643
                You have to look at the SG as an attraction motor that imparts momentum to the rotor and you have to pay to get it out of magnetic equilibrium, plus you have to pay for the frictional losses plus the losses of the circuit its self. So the point is maximize attraction and maximize electromagnetic strength and see where or what you end up with.


                Dave Wing
                Last edited by Dave Wing; 03-05-2020, 01:19 PM.

                Comment


                • Hi Rodolphe,

                  Breakthrough!
                  So what I had done so far when tuning the SG is starting the SG until it ran at max speed, which so far yielded +/-191rpm max, with double firing… Reading your reply today I thought, well maybe I should scan the whole spectrum of the potmeter again, and see if it fires single at some point even though it might be at a lower rpm. So I started it up and waited till it got to max rpm (potmeter at +/- 82 Ohm, +/- 191rpm), then I turned resistance of the potmeter down and while I did so the rpm dropped as well, until at one point it increased super fast again to 277rpm and single fired instead of double! I stopped the machine to measure where the potmeter was at: +/- 40.5 Ohm.
                  But now comes the funny part; when I started my SG again it did not sped up to this 277rpm again, but stuck at +/- 170rpm… I then reduced the resistance of the potmeter again a bit and it increased again till about 254rpm. Then I had to increase the resistance again to tune it back to max rpm: 277... I then stopped the machine again and started it up again, but had to repeat the same process to get it to 277 rpm which is:
                  1 start the machine and wait till rpm gets stuck @ +/- 170
                  2 decrease the resistance of the potmeter a bit till the SG speeds up rapidly
                  3 increase the resistance of the potmeter for max rpm +/- 277.
                  Is this the ritual you guys have to do as well???
                  This is normal behavior for the SSG running in attraction mode. I had mine set up with a double pole switch and two separate branch resistors when I first got "Gary's Complete Advanced SSG Build" running. I now have it changed back to a pot and a single branch resister. Here's a link to where I discussed it in Post #6 of the thread. http://www.energyscienceforum.com/fo...nced-ssg-build

                  So Gary, I’m above that reference value you gave me of 0.175mA/coil in radiant mode when I tune my machine for max rpm. With my 8-coiler, I sit now at 1.8/8 = 0.225mA.
                  That's a little high and may be wasting some energy. Try increasing and decreasing the coil to magnet gap as well as varying the pot resistance.

                  Gary Hammond,


                  Last edited by Gary Hammond; 03-05-2020, 03:59 PM.

                  Comment


                  • Hi Gary, Dave,

                    Thank for your answers and feedback!

                    I'm on a holiday at the moment. When I'm back will do as you mentioned Gary; see if i can bring the energy input down by adjusting the gap.
                    Before I went on this holiday, I did the first check with the capacitor dump circuit (with 555 timing circuit), worked, but only ran it for a minute, so want to do some more testing with that as well. Will post about that in the thread regarding that circuit. Started to make a shopping list to build the comparator circuit as well. If that is all done, will continue with the third manual.

                    Best regards,
                    Rodolphe

                    P.S. @ Dave, I think I saw that you're from Edmonton? Too bad i didn't got into this SG stuff sooner; lived there for a while... while writing this I wear my Oilers shirt, Gretzky 99
                    Last edited by pearldragon; 03-30-2020, 04:10 AM.

                    Comment


                    • Hi Gary, Dave,
                      As Gary suggested I started to experiment with the gap distance, starting with a 1mm gap, tuning for highest rpm and then reading the amperage draw. Then increasing the gap 1mm, repeating this procedures and so scanning from 1mm up to 8mm with 1mm increments. All in radiant mode. Input-wise this yielded the best results at a 1mm gap: input 1.55A, 12.46V (running), 310rpm, so about 0.19mA/string, still a bit high. I assume it would yield even better results if I would decrease the gap even further, but then the magnets get very close to the core. Furthermore I noticed that the machine made quite a bit of noise when running in this max rpm area with the 1,2,3 & 4mm gap. With bigger gaps the noise faded away.

                      Then today I started the SG again (the gap being 1mm) and rather than looking at/tuning the rpm value, I looked at my amp meter and used that reading to tune for an optimum and could bring it to 1.4A, so about 0.175mA/string and in the ballpark that Gary gave as a reference. Speed was about 306rpm. I do have to say that the machine was very sensible here; turning the potmeter ever so slightly away from this point meant an increase in amperage.


                      Here's a link to where I discussed it in Post #6 of the thread. http://www.energyscienceforum.com/fo...nced-ssg-build
                      I’ve read through this thread and now am so confused/have so many questions that I do not know where to begin/continue anymore with my machine hahaha. But I’ll try to formulate my utter confusion here as clear as mud, I mean as clear as possible (post number references are to the above mentioned thread (Gary's "Complete Advanced" SSG Build) unless stated otherwise):


                      1a) Gary’s high rpm
                      In post #1 I read that Gary got a max speed of 375rpm, that’s quite a far above my 310rpm (at a 1mm gap). Could this have to do with the fact that I have 24 magnets instead of Gary’s 21 and or a slight difference in rim diameter? Or are there other factors that determine this relatively big difference in rpm?
                      2b) Now in post #6 I read you even got it to 380rpm, but with shifting between several base resistance values. After reaching my highest rpm (single firing) I tried turning the potmeter back and forth to see if my SG had a 4 speed transmission as well, but it does not; only an overdrive.
                      The fact that you can shift several times, does this has to do that you connected the cap dump circuit and running in CG mode, or is it a 4-speed in radiant mode with no cap dump too?
                      (nice car that Bradley GT!)

                      2a) Singe/double/triple fire
                      Dave wrote earlier (Post #212: http://www.energyscienceforum.com/fo...?t=399&page=22):
                      You want to tune the machine to one pulse this will maximize the rotor speed and increase AC generator output.
                      Now on Gary’s… build thread I read that charging goes faster when not running at the highest possible single pulse rpm, but at the lower peak, where it still double fires (and at the same time drawing less current). Dave’s statement seems to contradict the measurements posted on Gary’s…build thread. Or do I misinterpreted the two?
                      2b) I have scope reading of my SG where it was even triple firing, has it been investigated by any of you if that yields even better charging results (still need to by a CBA to do some proper measurements myself).


                      3a) Load/friction/drag
                      On several posts on the Garrys… build I read about advantages of adding a load or some friction, most prominent I guess in Garry’s post #10 and Yaro’s post #14 where he says that the performance is more stable and predictable when a load is attached. I have to think about what would be an easy ‘Load' for me to attach, since adding a fan to my SG would mean fixing my rim to the shaft, adding external bearings and then fixing a fan to the shaft… if any you have any suggestions, feel free to share. (Not sure what the generator coil thing is all about that I see mentioned on this thread a lot, but that might just be something from the advance handbook which I haven’t got to yet).
                      3b) Regarding the load/drag/friction, Dave, was this also where you were referring to when you said (Post #212: http://www.energyscienceforum.com/fo...?t=399&page=22):
                      One more thing we need mass on these pulse motors so put a 20 pound flywheel on your bike wheel. And the switching to be 50% on time and 50% off time, just like the 1984 Bedini free energy generator.
                      Although the fan was optionally mentioned in the first Handbook I think, I did not interpreted it in the way that it was a needed to add a load to the machine to have it perform better…

                      With all the things I run into myself and you guys are helping me with, I’m keeping track of notes/suggestions for the Handbook(s) for when another revision would come out, but I’m not sure if a new release is planned at all for the future.


                      4a) Correct tuning
                      So before reading this Garry’s…build thread I was under the assumption that tuning the SG was a relatively straight forward thing. Now it seems that it greatly depends of how it is setup: e.g. load/drag or not, cap dump circuit or not, CG or radiant. And when you’ve chosen a setup, then the whole spectrum of rpm/firing/gap has to be scanned doing several runs with a CBA to find an optimum…
                      But based on what I read here on this thread, could I state that I can skip the whole 'overdrive' area (=single pulse area), staying in the double firing area? (maybe exploring the lower triple firing area?) and using CG mode? (CG mode = Advance handbook, not built yet). That would at least narrow things down a bit…


                      5) Cap circuit
                      Although I will continue building the comparator cap dump circuit (if not for an energy advantage, then at least to learn from it) I read on several posts here that this add-on does not necessarily have an advantage. This in contrary to what is mentioned about it in the Intermediate handbook and what I’ve just read about some theory in the book “Free energy generation” – Bearden/Bedini.


                      From post #17 things are really starting to go over my head, so for now I think I should concern myself only with the stuff/questions mentioned above.

                      Best regards,
                      Rodolphe

                      Comment


                      • Hi Rodolphe,

                        I'll try throwing a little more mud your way. LOL

                        1a.....Wheel size and number of magnets greatly influence the RPMs. My wheel rim measures about 24.63 inches ( 57.5 cm ) in diameter and has 21 magnets. The same wheel with 24 magnets will run slower than it will with 21, and the same wheel with 18 magnets will run faster if every thing else is unchanged. A smaller wheel will also run faster than a larger wheel, but lacks the momentum of a larger wheel.

                        Other factors that affect speed are bearing friction, precision of build, matching of electrical components, size and length of battery cables, air gap, pot setting, battery size, battery voltage, and battery condition. There are lots of variables!

                        2b..........
                        The fact that you can shift several times, does this has to do that you connected the cap dump circuit and running in CG mode, or is it a 4-speed in radiant mode with no cap dump too?
                        I had to do this only in radiant mode whether the cap dump was used or not. This was done in order to get it up to a speed where it would single pulse. I was trying to get the most speed I could to increase the output of the generator coils. The LEDs lit up brightly, but the charging suffered. This was all an experiment, and was full of compromises.

                        2a...........When running in radiant mode, my machine charges fastest when double pulsing at 200 - 210 RPM and a .350" (8.8mm) air gap with about 12 ohms common base resistance. I just double checked that this evening. I reset the gap to .35" and the pot to about 12 ohms to charge up an old 650 CCA starting battery I removed from my SUV. By manipulating the pot back and forth I was able to get it up to 300 RPM and single pulsing. But it charges slower that way. It was also lighting 42 each LEDs from the generator coils for a total of 84 LEDs while running at 300 RPM. It's pulling 1 amp at this setting.

                        (Then I decided to experiment with the generator coil outputs to see if they would keep a small battery charged that was powering the Arduino and relay switching on the battery swapper I just finished building. It seems to be holding that small battery at 12.55 volts. However this slowed the speed down to about 278 RPM, and is still charging the big battery as well.)

                        Others have also reported better charging in radiant mode with double pulsing. And triple pulsing is worse than either single or double pulsing.

                        3a...........Mechanical load. ........ About 23% of the electrical input energy can be extracted from the SSG which causes a slight reduction in both the RPM and current draw and a slight increase in charging ability. The addition of generator coils is a neat way to do this and be able to light some LEDs or charge a small battery from their output.

                        4a ............You are correct. There are a lot of variables in tuning for best results in each mode of operation. This is the fun part and teaches you a lot about the technology!

                        5 ........... Don't worry about from post 17 on. Back popping and coil shorting are areas I haven't explored yet either. Get the basics down first. And you can also branch off into lots of other stuff too, like window motors, zero force motors, attraction motors, flux-gate generators, battery swapping, split the positive, split the negative, Tesla switch, two stage mechanical oscillator, etc., etc. It's all related and all interesting!!

                        Gary Hammond,
                        Last edited by Gary Hammond; 03-31-2020, 06:58 AM.

                        Comment


                        • Hi Rodolphe,

                          While I was playing around with the SSG, I decided to finish charging the same 650 CCA battery that was being charged in radiant mode in the last post. But now it is using my cap dump comparator and running in common ground mode. It was running about 300 RPM pulling the LEDs and dropped down to 275 RPM when the generator coils were hooked up to a small auxiliary battery powering the control circuit of my battery swapper. And I did have to play with the pot to get it into single pulse mode when it started up. Here's a brief video of it running.


                          Gary Hammond,

                          Comment


                          • Hi Gray

                            Thanks for all your answers and the movie!

                            Regarding your post #236
                            1a) ok, I understand, assumed it would be like that.

                            2b) Reading your answer I’m still left with the same question mark: how can it be that you can shift 4 times to get it to 380 rpm, while I can only once (or twice actually; once turning the potmeter down to get it from +/-200rpm to +/-300 rpm (after startup) and then turn it up again to fine tune it). If I do the same thing again, it doesn’t yield an increase in rpm compared to the first time I do it). I do understand from your answer that this was not the most efficient rpm for charging, just trying to understand why you can shift multiple times and I cannot.

                            3a) Ok. Did some browsing through the advanced handbook and saw the generator coil mentioned there, so will add that as my “drag” once I get there.

                            4a) So in my post #235 I thought to understood from reading through the posts in the thread Garry’s…build that the single pulse area is not the most efficient, but now when I read your post #237 here, I see you’re in the 300/275rpms: that is the single pulse area again I would assume? Is the situation in which you run in your video/post #237 a specific situation where the single pulse does have an advantage over the double pulsing area? Or I’m I misunderstanding something?
                            (also related
                            JB told us at the 2013 conference (as shown in EFV 34) that the charging efficiency drops off beyond a certain critical speed, as do nearly all other machines. I think that was part of the reason for the two fans on the machine he demonstrated.
                            post #6 on Garry’s…build thread).

                            5) Ok glad to hear, than I leave that for what it is for now. I do consider though to start building the 1984 machine in parallel, talked about in the first part of the Book “Free energy generation – Bedini/Bearden” also mentioned in chapter 7 of the Advanced Handbook I saw… But first things first: a properly working cap dump circuit (and the comparator version after that).


                            Regarding your movie of post #237
                            6) I see heatsinks on your SG, so that gives me the impression your SG runs in Repulsion mode rather than attraction? (although you could have been an early builder, first building in repulsion mode, later modifying it to attraction and leaving the heatsinks on). If you’re running in repulsion, I would assume that my amperage draw at the input would be a bit lower than yours (since I’m running attraction), but so far 0.175mA/coil is as low as I got…

                            7) I hear/see you talking about a “battery swapper”. By quickly browsing through the advanced manual I could not find anything about it. Did I not look good enough, or is this mentioned somewhere else (being not in the handbook)?


                            Many thanks in advance,
                            Regards,
                            Rodolphe

                            Comment


                            • Hi Rodolphe,

                              2b) ...........
                              just trying to understand why you can shift multiple times and I cannot.
                              I was using three 12 ohm resistors in series and had a SPDT switch connected across them to short out one, two, or no resistors. By switching them this way it was doing the same as you are doing with a pot. It gave the effect of gradually changing the resistance lower at a critical speed to get into single pulse mode, and then increasing the resistance to get it up to max RPM. Using a pot is a much easier way to do it than switching resistors in and out of the trigger circuit.

                              4a) ..........I was using the cap dump on a somewhat sulfated battery running in common ground mode and single pulsing. I wanted to do this in order to get maximum RPM for best charging from the generator coils on the back. I usually use the "genny" coils to light up 84 LEDs, but wanted to see if they would put out enough to keep a small battery charged while it was carrying a small load (the battery swapper control circuit). I did have to coax it into single pulsing with the pot. (I have now replaced the switch and base resistors with a pot.) It was able to do this and still charge the large battery with the cap dump circuit. If you look at the video I posted, you can see the pot installed on the SSG machine.

                              The only time I get better charging with double pulsing is when charging in straight radiant mode. But when in common ground mode, charging is always best when single pulsing. The cap dump can be used in either mode.

                              6) ...........This machine has always ran in attraction since I assembled it with kit components from Teslagenx. The first machines I built ran in repulsion, but later were changed to attraction mode as well. Attraction mode uses less run current than replulsion. The heat sinks were in the kit, so I used them to help hold the transistors evenly in place.

                              7) ...........Battery swapping is an adaptation of changing positions of three batteries where two in forward series, with one in reverse connection, are used to run a load. Two power the load and the third one is simultaneously being charged by the run current. And by adding a forth battery, one can then be switched out of the loop to rest and absorb the charge before running under load again.

                              This concept has been shown in John's original websites and then repeatedly in several places on this website and others as well.

                              My swapper is an automated circuit that does this without using manual switches and having to "babysit" it.

                              This is all discussed in Peter Lindemann's presentation at the 2016 Energy Science Conference "Bedini SG - Beyond the Advanced Handbook" shown in this link. http://bedinisg.com/

                              Here's the trailer for that link.

                              And here's a link to a thread where I show and discuss my swapper actually in use. http://www.energyscienceforum.com/forum/alternative-energy/john-bedini/bedini-sg-official-monopole-forum/bedini-monopole-1-advanced/72661-automatic-4-battery-swapper

                              Gary Hammond,
                              Last edited by Gary Hammond; 04-06-2020, 12:06 PM.

                              Comment


                              • Hi Gary,

                                Thanks for all your answers.

                                2b) / 4a) / 6) ok all clear now.

                                7) Thanks for the links! I have the video, just not watched it yet. I guess I’ll finish the advanced handbook first before concerning myself with this “swapper”.


                                8) Generator Coil
                                On page 40 of the Advance Hanbook I read the specs for this coil: 10 twisted strands of #16 wire, with a total length (when all the strands are connected in series) of 1000 feet (= 305 meters). I guess this procedure with the 10 twisted strands is only done to make the wire length more practical? Being 100 feet (x10)? But for the function it would not matter if it was a1000 feet singe wire wrapped around the coil?
                                I ask this since I plan to get my coil wound by a coil winder, so winding a single wire of 1000 feet is no issue., while getting a 10 stranded wire wound will not be so easy (by the coil winder).


                                9) Sniffer coil
                                My sniffer coil is just a few (200 or 300?) turns of AWG 26 wire wrapped around a short piece of 3/4" pvc plastic pipe.
                                I bought a spool AWG26, and calculated it has around +/-650 windings. Could I use it as is? Or should the amount of windings be more in the ballpark that you mention, 200 to 300 because it would have a too high impedance? In case I do need to reduce the amount of windings, is there an easy way/trick to count them when winding? How did you manage to count the amount of your windings? I could lay out a couple of meters on the floor, and then with the bobbin diameter I can roughly calculate it, but I guess that is not how you did it?


                                Regards
                                Rodolphe

                                Comment

                                Working...
                                X